PicoBlade connectors are essential components in many modern electronic devices due to their compact size and high reliability. Whether you’re an electronics hobbyist or a professional, knowing how to install or replace these connectors is a valuable skill. In this blog, we will provide a detailed guide on how to install or replace a PicoBlade connector in your device. We’ll also introduce KONNRA, a leading connector manufacturer known for their comprehensive instruction manuals that assist you through every step of the process.
Ⅰ. Introduction to PicoBlade Connectors
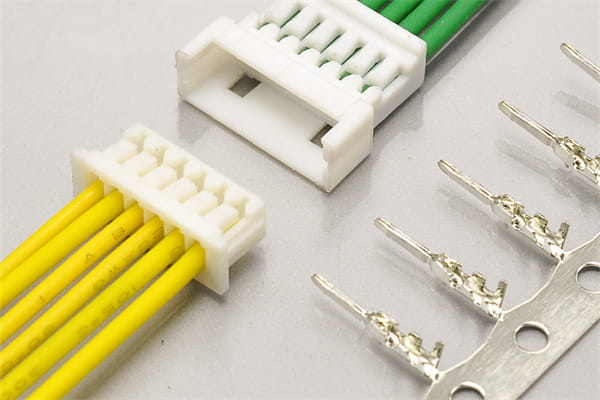
1.Definition and Features
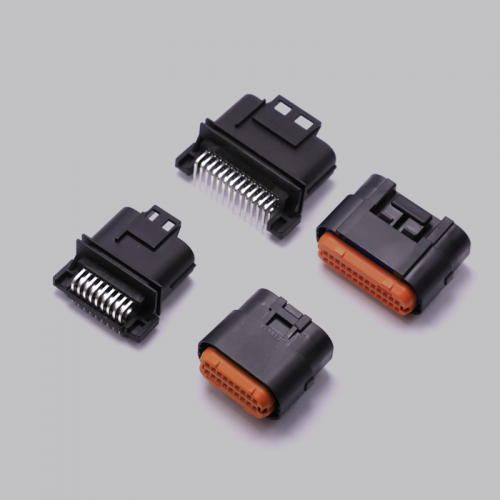
PicoBlade connectors are a type of miniature connector used in a wide range of electronic devices. These connectors are prized for their small size, making them ideal for applications where space is at a premium. They typically feature a 1.25mm pitch, which allows for a high density of connections in a compact form factor. PicoBlade connectors are commonly used in applications such as consumer electronics, automotive systems, medical devices, and industrial control systems.
2.Working Principle
The primary function of a PicoBlade connector is to provide a reliable electrical connection between two circuit components. These connectors usually consist of a male header and a female housing with terminals that ensure secure mating. When the connector halves are joined, the electrical signals can pass through the contacts, enabling the connected devices to communicate effectively.
Ⅱ. Preparation
Before you begin the installation or replacement process, it’s crucial to gather all the necessary tools and materials and to understand the safety precautions involved.
1.Tools and Materials Needed
- Soldering iron and solder
- Desoldering pump or braid
- Tweezers
- Multimeter
- New PicoBlade connector
- Isopropyl alcohol and a cleaning brush
- Anti-static wrist strap
- Screwdrivers and other basic disassembly tools
Safety Precautions
Static Electricity: Always wear an anti-static wrist strap to prevent static discharge from damaging sensitive electronic components.
Work Area: Ensure your work area is clean and well-lit. A cluttered workspace can lead to mistakes.
Safety Gear: Wear safety goggles to protect your eyes from solder splashes.
Power Off: Ensure the device is powered off and unplugged from any power source before beginning work.
Ⅲ. Removing the Old Connector
Power Down and Disassemble the Device
- Turn Off the Device:Make sure the device is completely powered down and unplugged from any power source.
- Open the Device: Use the appropriate tools to remove the screws and open the device’s casing. Be gentle to avoid damaging any internal components.
- Locate the Connector: Identify the PicoBlade connector that needs to be replaced. Take a photo or make a note of the connector’s orientation and the connected wires for reference during reassembly.
Desoldering the Old Connector
- Heat the Soldering Iron:Preheat your soldering iron to the appropriate temperature for desoldering.
- Desoldering: Use the soldering iron and desoldering pump or braid to remove the solder from the connector pins. Carefully heat each pin and use the pump to suck up the melted solder. Repeat this process for all the pins.
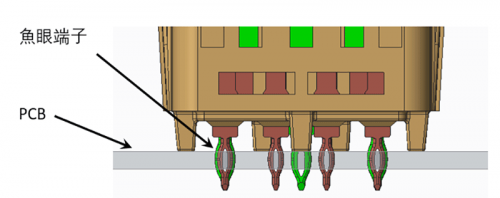
- Remove the Connector: Once all the solder has been removed, gently wiggle the connector free from the PCB using tweezers. Be careful not to damage the PCB pads.
Ⅳ. Installing the New Connector
Preparing the Solder Pads
- Clean the Pads:Use isopropyl alcohol and a cleaning brush to clean the solder pads on the PCB. This removes any residue and ensures a good solder joint.
- Inspect the Pads: Check the pads for any damage. If a pad is lifted or missing, repair it before proceeding.
Aligning and Securing the New Connector
- Position the Connector: Place the new PicoBlade connector onto the solder pads. Ensure it is correctly aligned according to your reference photo or notes.
- Secure the Connector: Use a small piece of tape or a fixture to hold the connector in place if necessary.
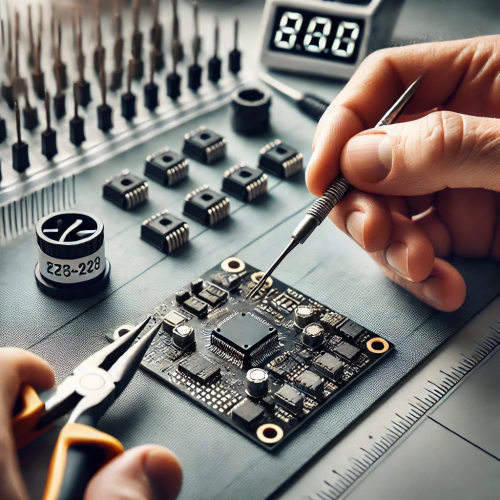
Soldering the New Connector
- Tinning the Soldering Iron: Apply a small amount of solder to the tip of the soldering iron to improve heat transfer.
- Soldering:Touch the soldering iron to both the pad and the connector pin simultaneously. Feed a small amount of solder into the joint and allow it to flow. Remove the iron once the joint is formed.
- Repeat: Solder all the remaining pins, ensuring each joint is clean and shiny. Avoid using too much solder to prevent bridging between pins.
Ⅴ. Testing and Reassembling the Device
Electrical Testing
- Inspect the Solder Joints: Visually inspect all the solder joints to ensure they are well-formed and there are no solder bridges.
- Continuity Test:Use a multimeter to perform a continuity test on the connections. Check that each pin is correctly connected and that there are no shorts.
- Power On Test:If possible, power on the device while it is still disassembled to check that the new connector is functioning correctly.
Reassembling the Device
- Reattach the Casing:Once you have confirmed the new connector is working, carefully reassemble the device. Make sure all internal components are properly placed and secured.
- Screw in the Casing: Replace all screws and ensure the casing is firmly closed.
Ⅵ. Common Issues and Solutions
When installing or replacing PicoBlade connectors, you may encounter a few common issues. Here’s a detailed guide on how to identify and resolve them effectively:
1.Cold Solder Joints
Identification:
Cold solder joints are a common issue that occurs when the solder does not properly melt, resulting in a poor connection. These joints can be identified by their dull, matte appearance and sometimes rough, uneven surface. Unlike a well-formed solder joint, which is shiny and smooth, a cold solder joint lacks proper adhesion and can lead to intermittent connections or complete failure.
Solution:
To fix a cold solder joint, follow these steps:
- Reheat the Joint: Carefully reheat the cold solder joint with your soldering iron. Ensure the tip of the iron is clean and well-tinned.
- Apply Fresh Solder: Once the joint is heated, apply a small amount of fresh solder to the joint. Allow the solder to flow and form a smooth, shiny joint.
- Cool Down: Remove the soldering iron and allow the joint to cool naturally without disturbing it. This ensures a solid and reliable connection.
2.Connection Failures
Identification:
Connection failures can manifest in various ways, such as the device not powering on, components not functioning correctly, or intermittent operation. These issues often stem from poor solder joints, misalignment, or solder bridges between pins.
Solution:
To troubleshoot and fix connection failures:
- Inspect Solder Joints:Use a magnifying glass or microscope to closely inspect each solder joint. Look for signs of incomplete soldering, such as gaps or holes in the joints.
- Ensure Secure Soldering:Re-solder any joints that appear suspect. Make sure each pin is securely soldered to its respective pad.
- Verify Alignment:Ensure the PicoBlade connector is correctly aligned with the PCB pads. Misalignment can cause poor connections or shorts.
- Check for Solder Bridges:Look for any unintended solder bridges between adjacent pins. If found, use desoldering braid or a solder sucker to remove excess solder and clean up the joints.
3.Pads Lifting Off the PCB
Identification:
Lifting pads are usually caused by excessive heat during the desoldering or soldering process. This can result in the copper pads separating from the PCB substrate. Lifted pads can lead to broken connections and make it difficult to secure the connector properly.
Solution:
To repair lifted pads:
- Assess the Damage: Examine the extent of the damage. If the pad is only partially lifted but still attached, you might be able to re-secure it. If it’s completely detached, you will need to create a workaround.
- Re-secure the Pad:If the pad is partially lifted, gently press it back into place and secure it with a small amount of conductive epoxy. Allow the epoxy to cure as per the manufacturer’s instructions.
- Create a Jumper Wire:For completely detached pads, use a small wire to create a jumper. Solder one end of the wire to the corresponding pin on the connector and the other end to the nearest undamaged pad or via. Ensure the wire is securely soldered and does not create any shorts with other components.
- Reinforce the Area:Apply a small amount of epoxy or hot glue over the repaired area to provide additional mechanical support and prevent future lifting.
Ⅶ. Conclusion
PicoBlade connectors are crucial components in many electronic devices, providing reliable and compact connections. By following this detailed guide, you can successfully install or replace a PicoBlade connector in your device. With the help of comprehensive guides from connector manufacturers like KONNRA, even complex tasks can be made manageable. Proper installation and maintenance of these connectors ensure the optimal performance and longevity of your electronic devices.